The Dactyl Experience
Preface
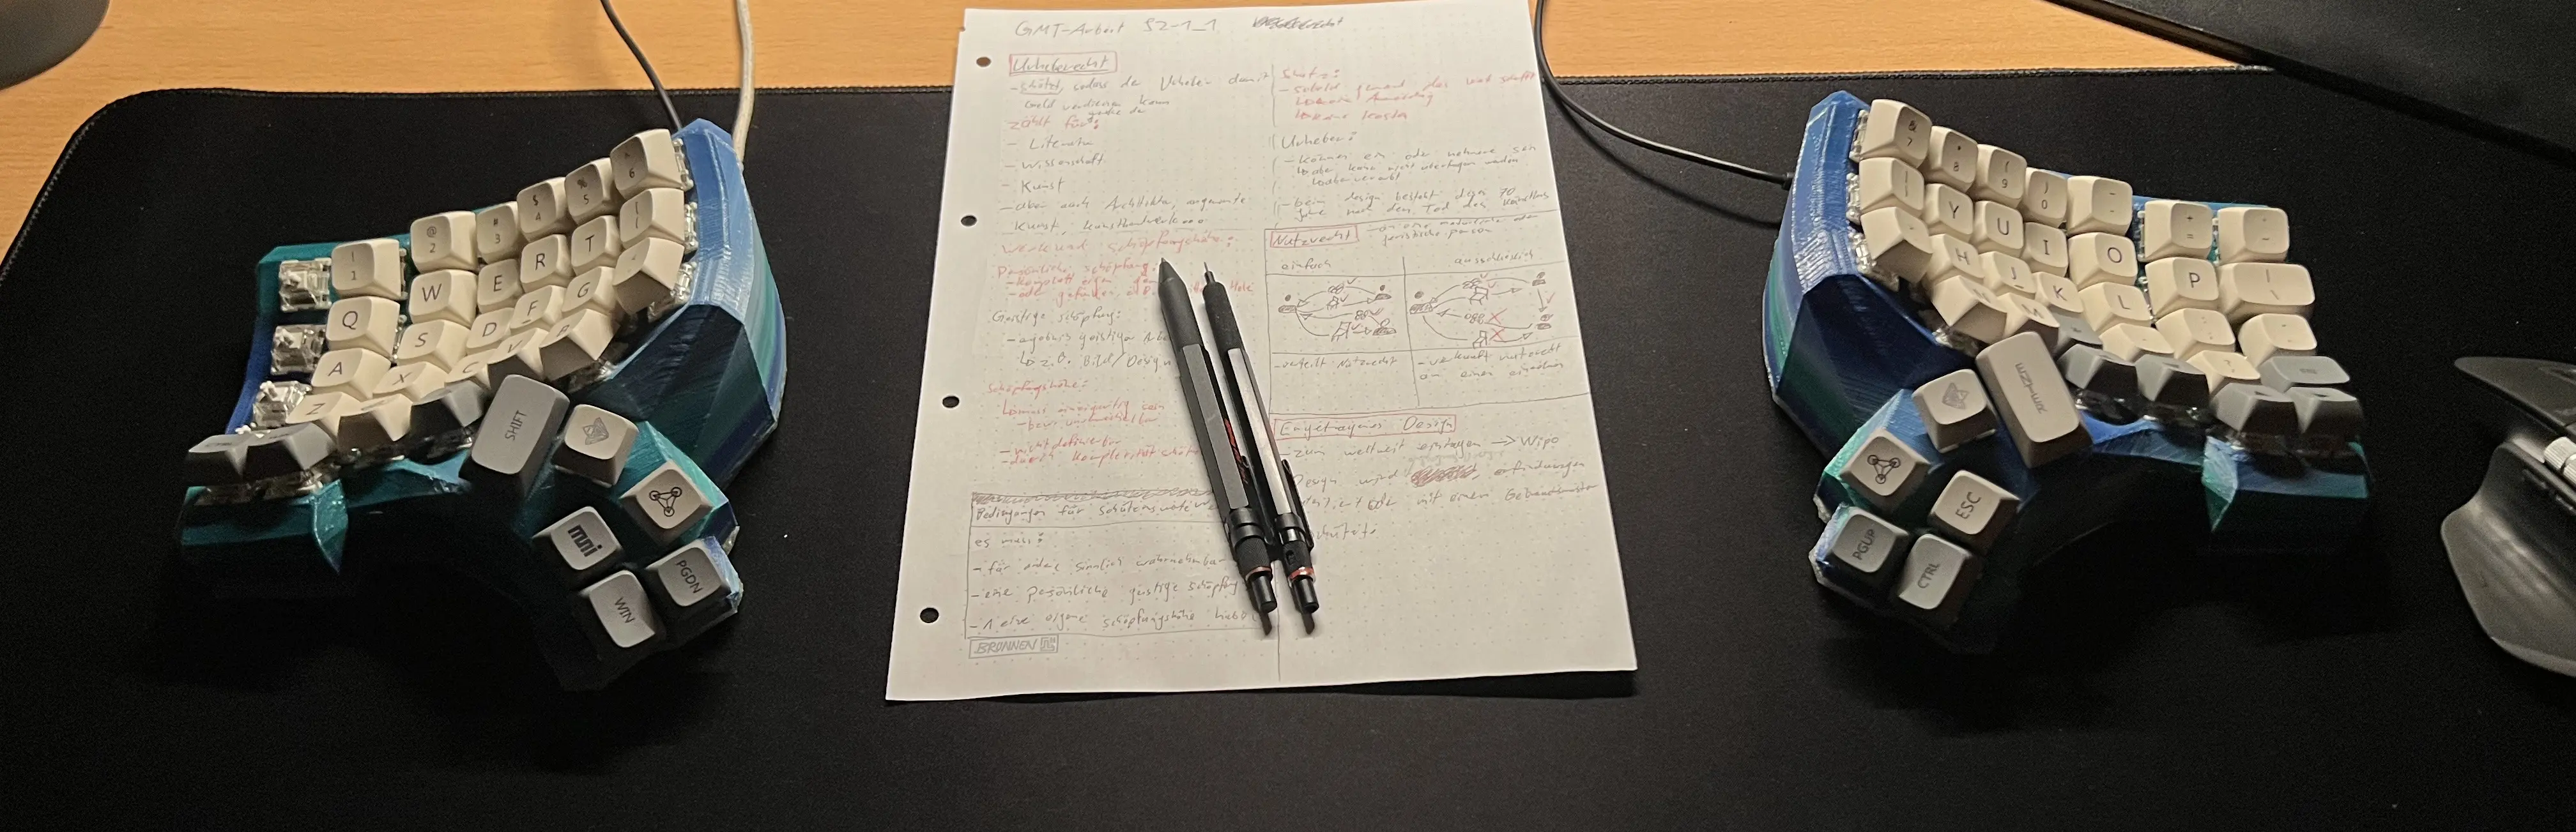
During the last days and weeks I’ve spend some of my time soldering, configuring and figuring about a dactyl keyboard. Now it is done and I can now type much more ergonimic and better than I could before, in the following I will talk about the process and maybe you can get something out of it :).
A dactyl - or dactyl manuform - keyboard is a parametric generated keyboard with the following ergonomic features to make it great to use:
Split : Allows one to keep the hands on shoulderwidth or further which makes it convenient to use over long time.
Staggered Columns : If you look at your keyboard the rows are most likely staggered, if you then look at your hands you see they are indeed not staggered horizontally but vertically. For clarification, there was a use for the staggered rows back in the ages of typewriters due to how they were constructed, but now many decades later we still carry the technical dept around with us [1] (that’s like if one were to use windows).
Thumb cluster : One of the things I still got very annoyed at after many years of typing is the following:
- Two pinkies are supposed to handle ~24 keys together.
- Two thumbs are supposed to handle 1!
This I would argue is inherently nonsense. The pinky’s range of motion is biologically-wise the most restricted and weak, whereas the thumbs range is bigger and able to be multiple times stronger [2].
So the dactyl features a thumbcluster of six keys, in some later section I will again mention it in my thoughts on the layout I made.
Preparing
Parts
3d-printed
- case l & r
- bottom plate l & r
- structure to hold Arduino-Pro-Micro, reset switch and 3,5mm jack socket
To be bought
- cables (cabels I’ve used were extracted out of 1,2m network cable)
- around 80 switches (opted for Gateron white)
- around 80 keycaps (without profile[3], e.g. xda)
- two Arduino-Pro-Micros
- two extra switches to reset the Pro-Micros
- jack cable (size variable to fit your need)
- twelve threaded inserts
Testing parts
There was just one part which I’ve tested and that were the switches, I did not trust them a lot due to being of aliexpress, but they are very good and appear to be real Gaterons.
I have tested them by testing if current is able to flow when being pressed, it did work on every switch :).
Building
Printing
To print the case with bottomplate one needs to setup a clojure environment which than takes parameters to calculate the model as SCAD file. To figure the clojure part out I’ve used this tutorial.
When clojure has calculated the model one can open it in SCAD, render it and save the .stl which can than be handled by a slicer. I used Ultimaker Cura for this step but it does not matter which one is used.
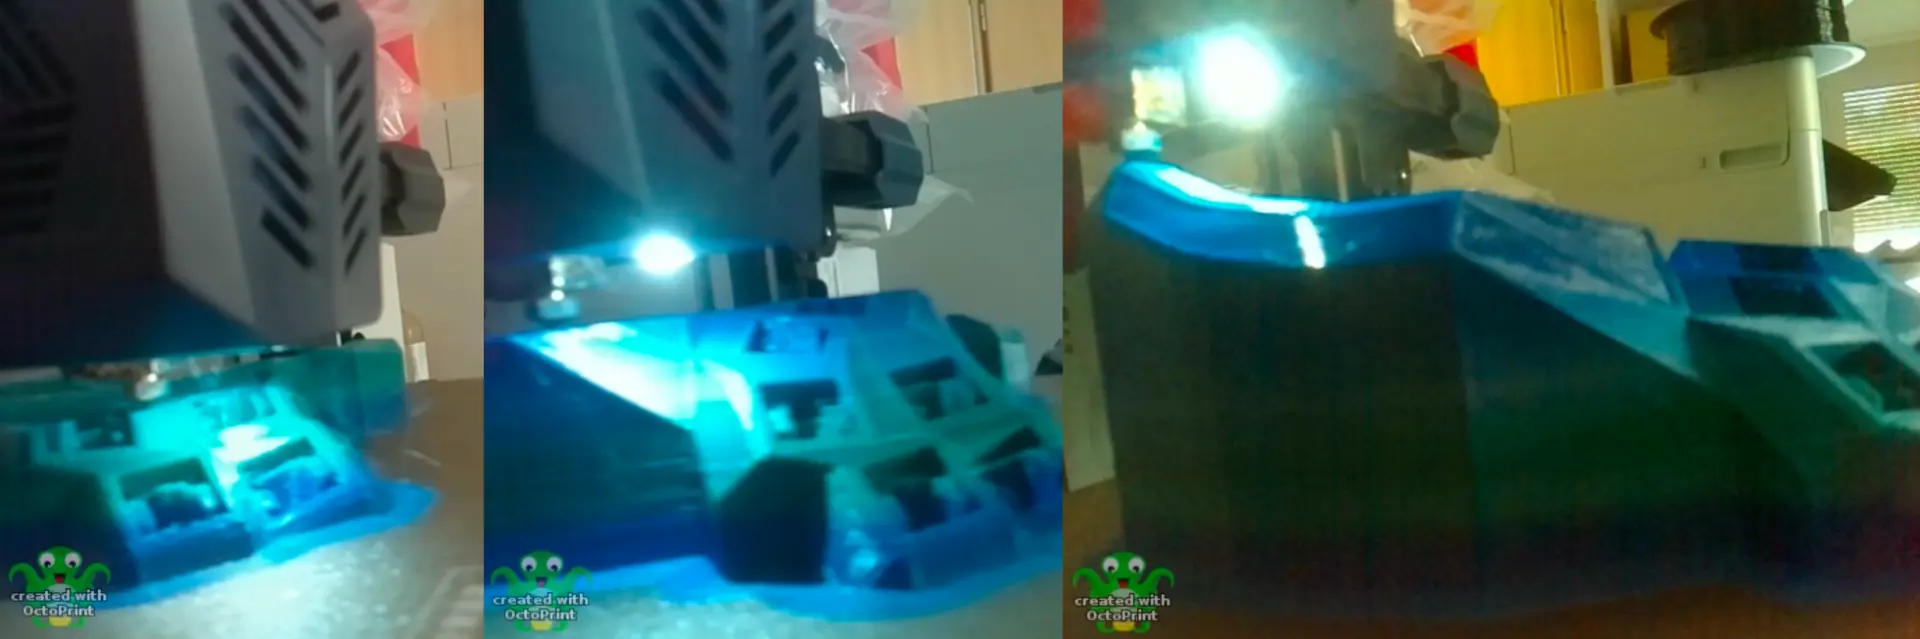
The printing took two times 16 hours for cases and two times 5 hours for the plates.
Cleaning up the print took together around 2 hours, the cases had some annoying spots where one had to remove support.
My 3d-printed parts are on my dactyl-manuform repo it’s a fork of the dactyl-manuform which is a form of the dactyl-manuform-mini-keyboard which is a fork of the dactyl-keyboard (manuform) which is a fork of the original dactyl. Minor instructions on how to change parameters, render it with clojure and scad, etc. are attached.
Soldering
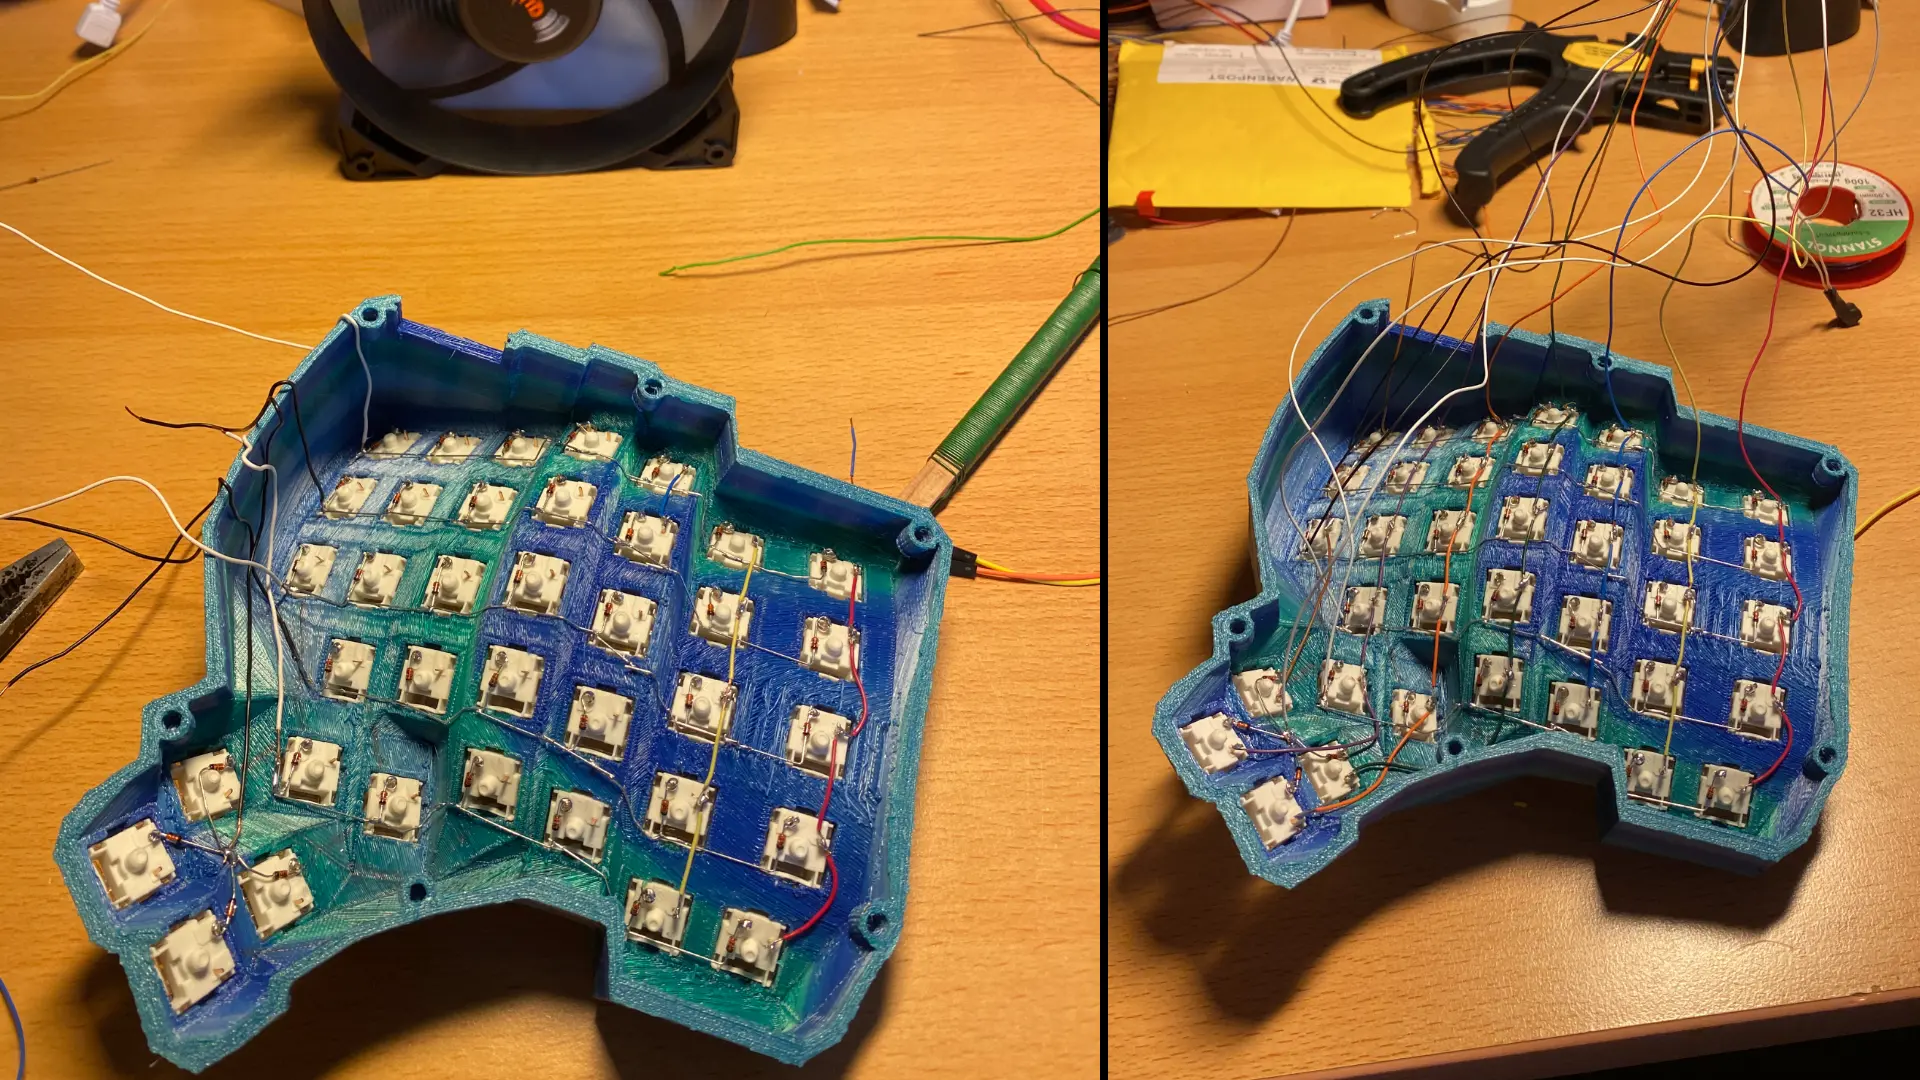
To solder I first needed a good amount of cable first I tried using too hard wire which didn’t work out, then finally what worked out was around 1.2 meters of old Network cable that were laying around.
The soldering was probably the most fun part of the project next to using the keyboard, I’ve not done it in months/years and it was a very relaxing process when one does not have debug messages pop up left and right, instead just to test if currents are able to flow from time to time. Note to myself: solder more.
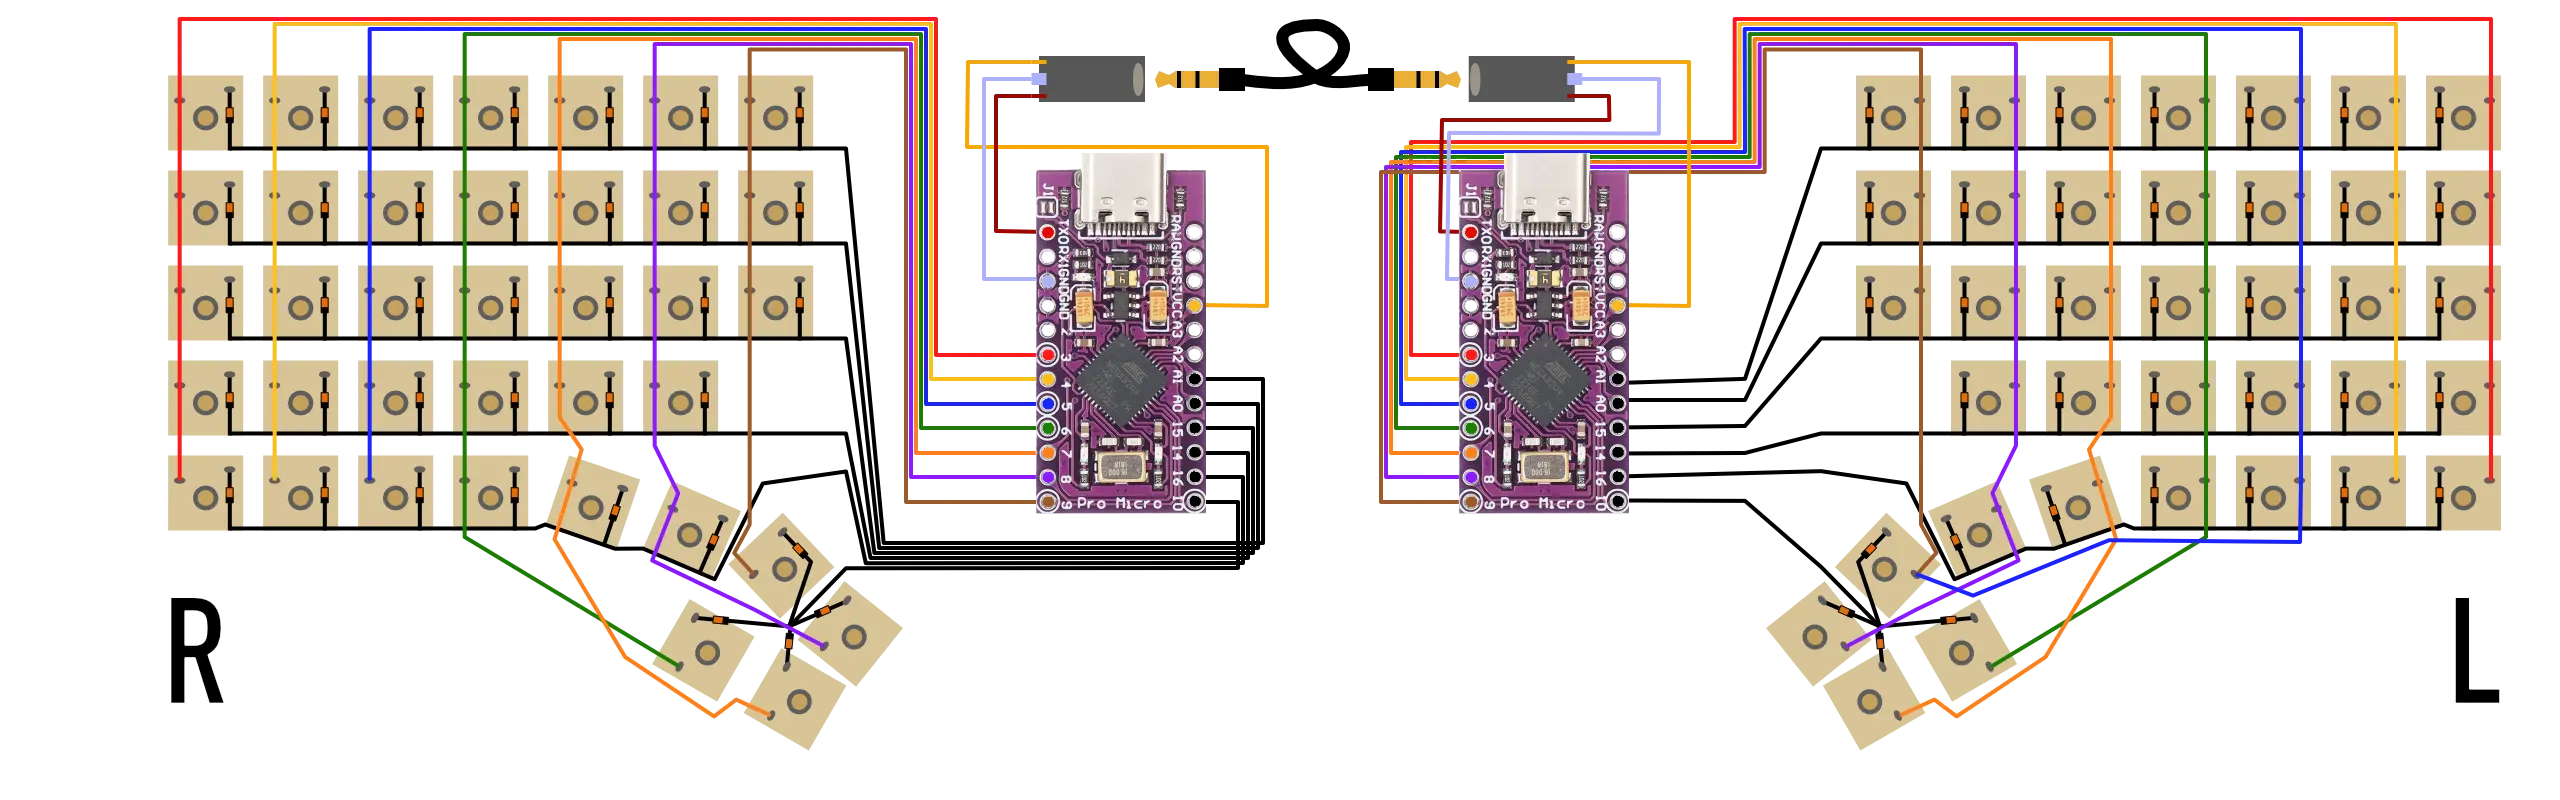
The wiring was not hard but I struggled to find circuit diagrams for the 5x7 dactyl-manuform, which I thought are neccessary. Turns out, it’s pretty intuitive if one just takes a minute to think about it.
In the following you can see how I’ve ended up wiring my keyboard.
Firmware
Flashing
Flashing was the part where I’ve struggled the most with, I’ve first tried to use zmk, then the qmk configurator and then finally the qmk cli. It seems like zmk is good but I’ve not looked enough into it. The qmk configurator seemed very easy but with that out of the way it is very limiting.
The qmk cli is very nice, it has good documentation, way more options than you could ever wish for… But it did take some days to comprehend and figure out I needed to change the pre set pins of my Arduinos, add three wires between the Arduinos and some other things.
That out of the way I assume when I’d go to build another keyboard with the knowledge of the tool that I now have it would be easy and fun.
Layout
As already said earlier in a footnote, I am planning to change the layout but here is what I will use for now before switching to something like dvorak.
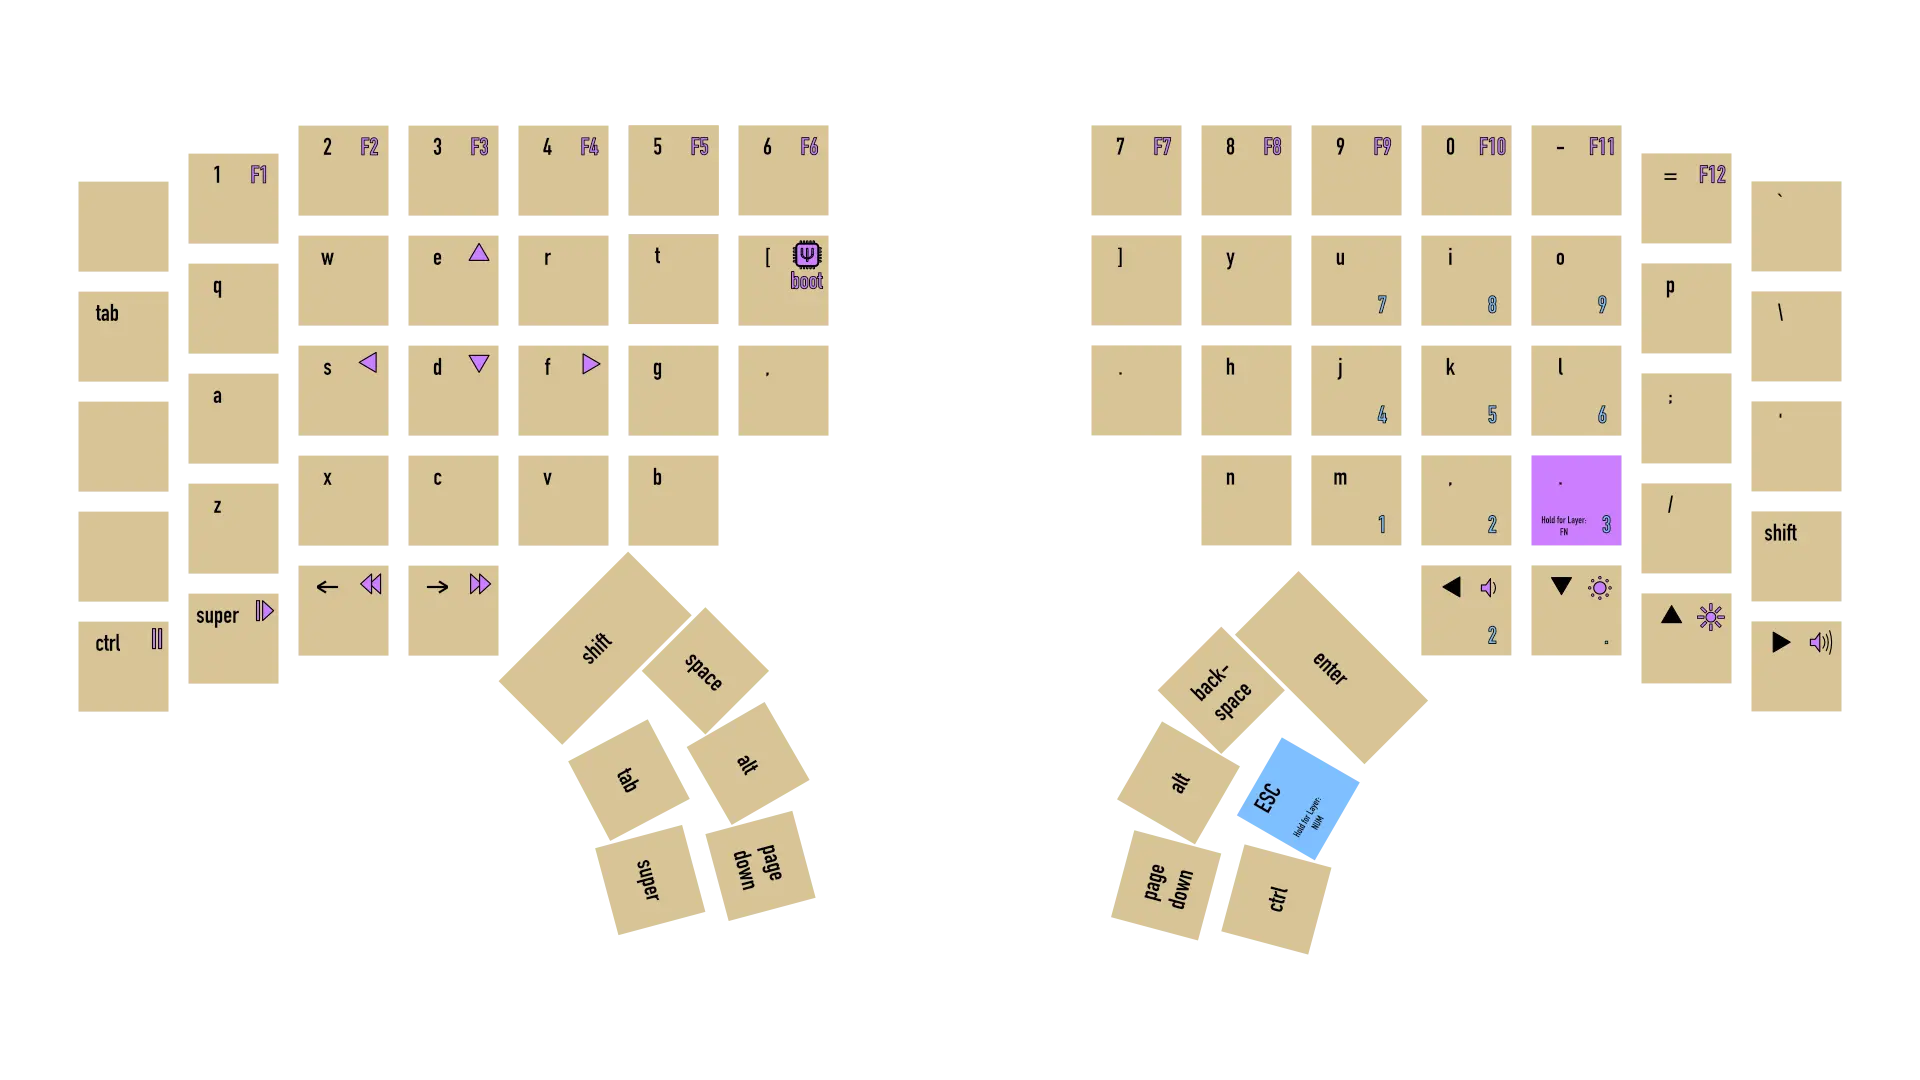
There are still a lot of conflicts within me on how to use the positions for function keys, on macos all I need is the command/super/win key, but when using arch with dwm I don’t have any use for it which makes it kind of pointless to place command in the “best” position and the other way around. both keys I would like to have on either side of the keyboard due to having to be used with the other side of the keyboard again.
As said, there are many conflicts and too few keys in the thumbcluster, so I will probably change the Layout it regularly.
Final Thoughts
Typing
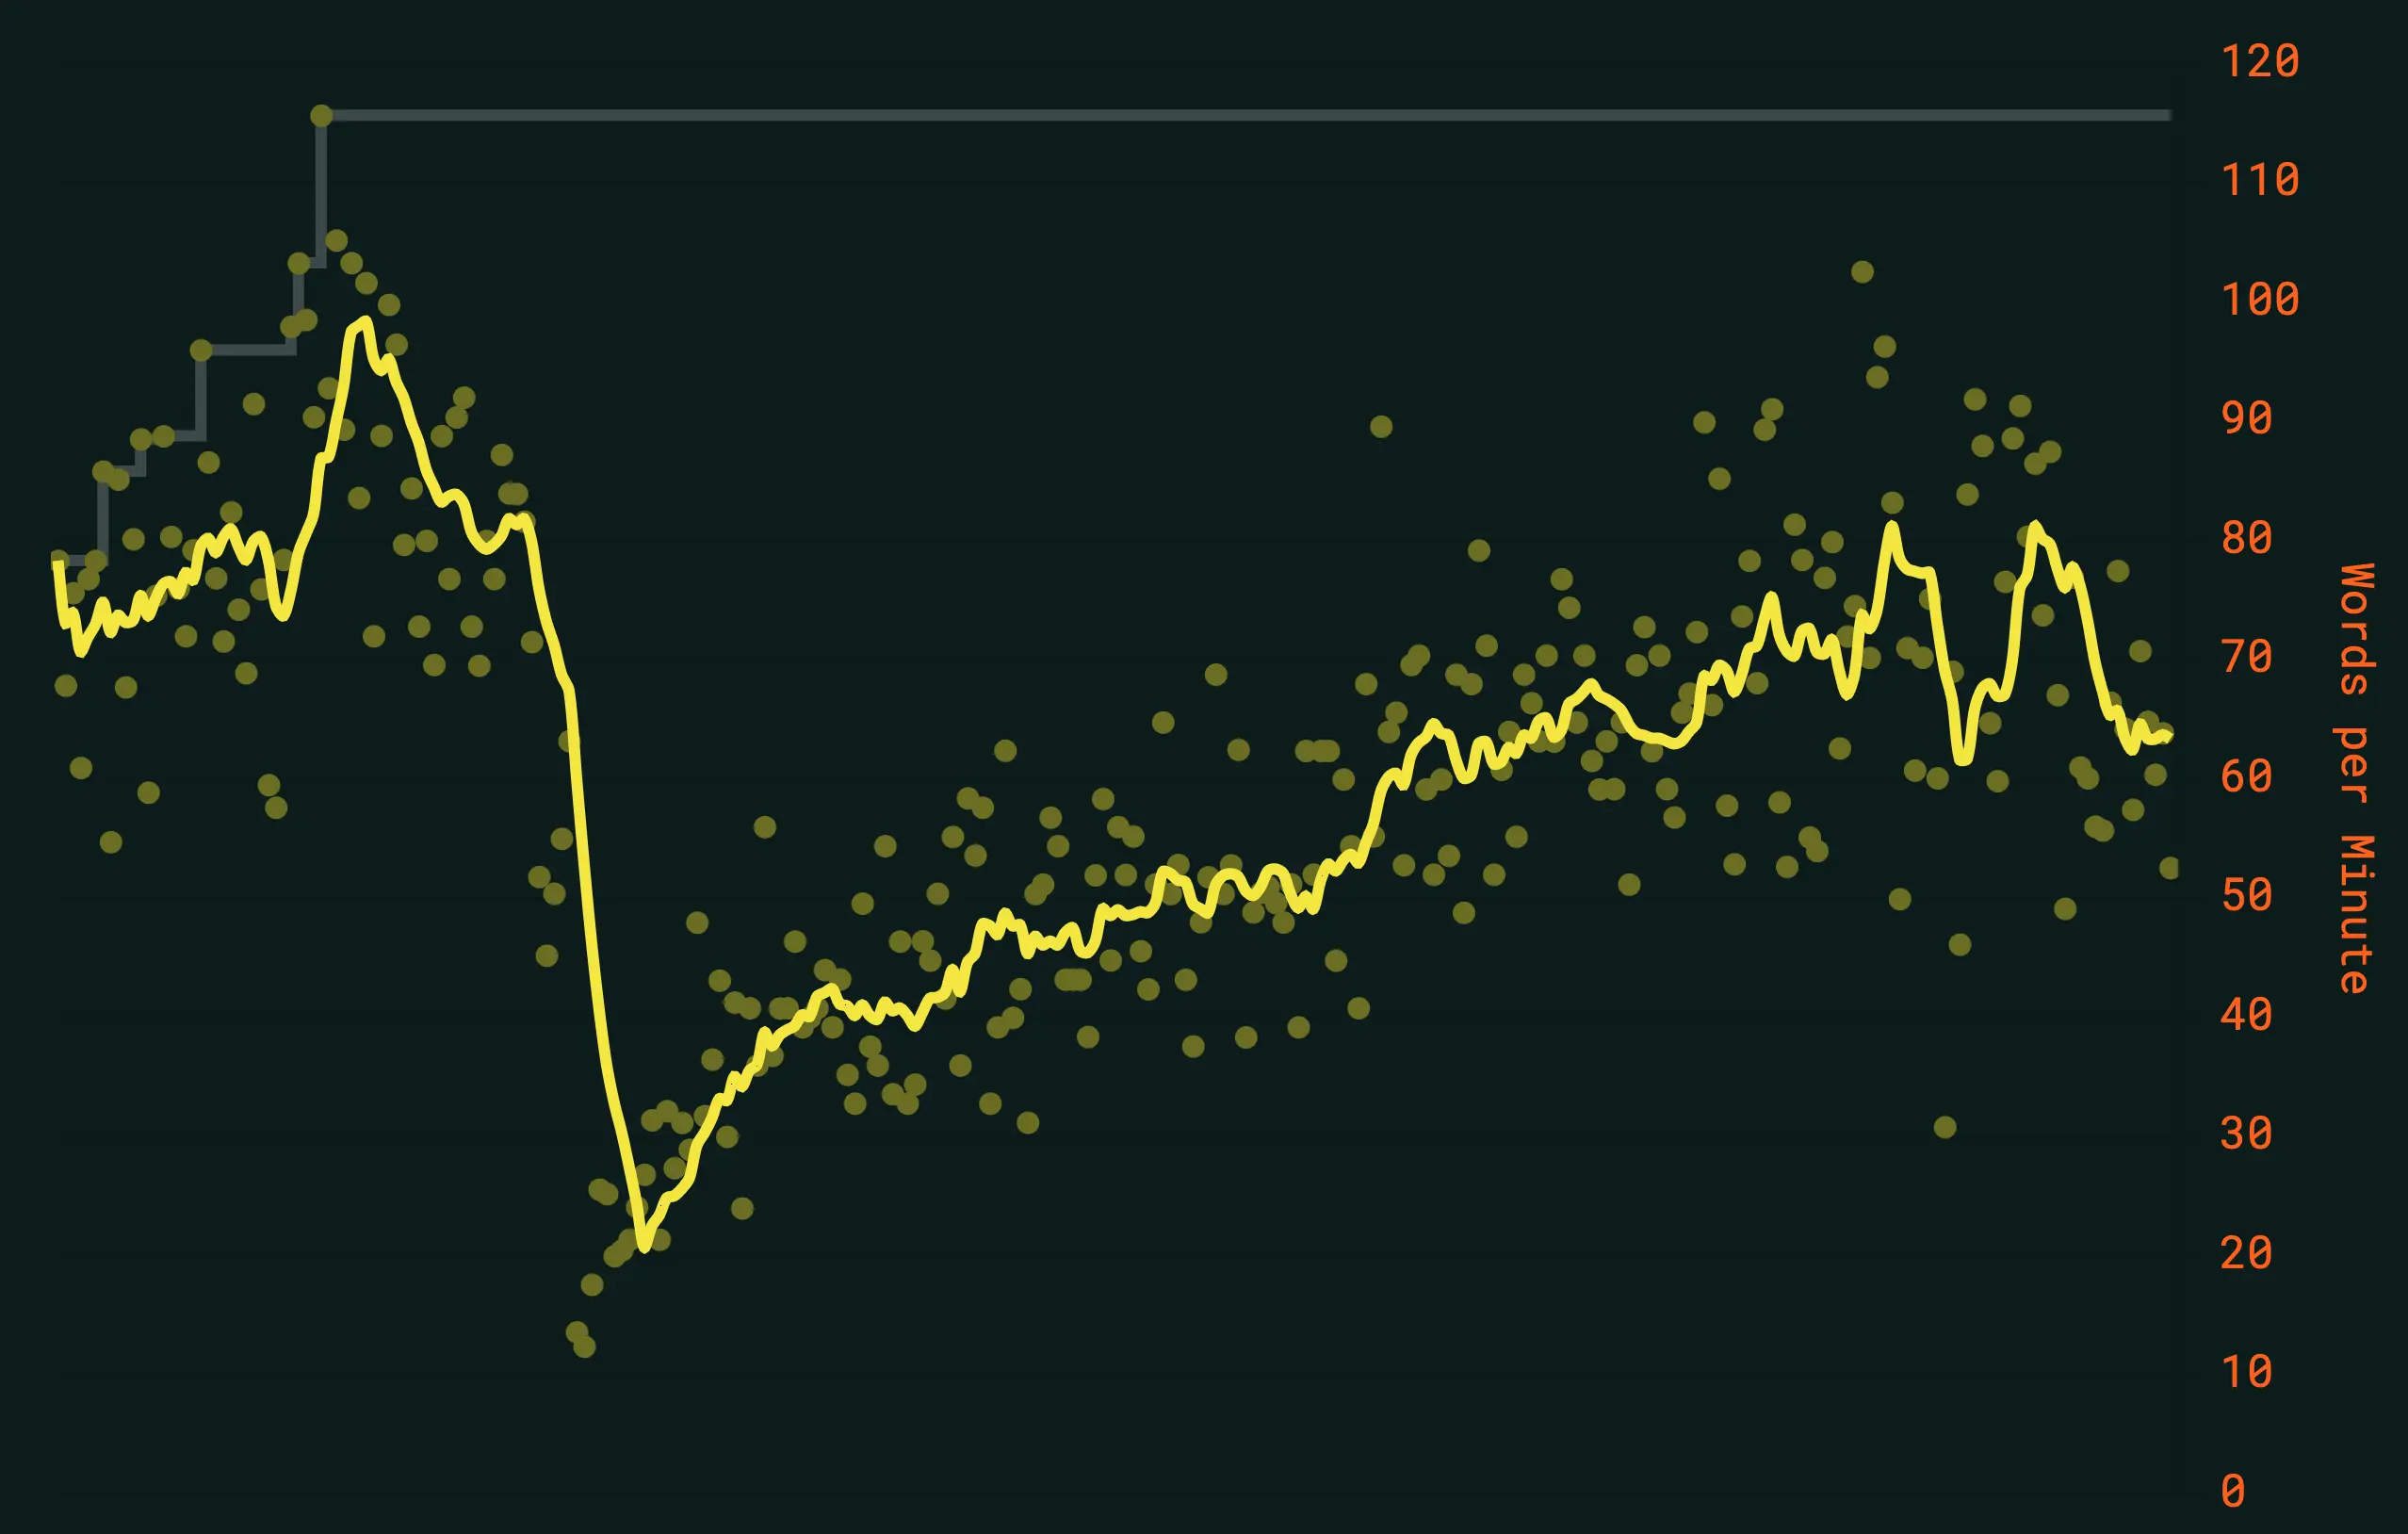
At the time of now I have been using the new keyboard for around a month, my speeds went up around 70 which is slower than i’ve expected, but that’s not an issue.
What I would have had done differently now that I know more
- less keys : I thought I’ll just go with the standard 5rows x 7columns, but now, having seen what qmk layers can all do i see why a lot of people in the ergo-mech community lately are building 34 key keyboard example. With a good firmware and layers one just does not need that many keys.
- maybe steeper angle of inner case : having the 20° which the keyboard has are great, but I am thinking that a steeper angle should be even better. Can’t say anything for sure, because I have never used a steeper keyboard but it would better form a case in which the natural hand position fits.
-
One could argue here that a layout change from qwerty/qwertz to something like dvorak would solve another huge issue with typewriters. Yes, expect a post on this the next weeks. ↩
-
I did not found science backing this, but in my head it makes a lot of sense, so you might as well trust me on it. ↩
-
I first tried keycaps with profile because I did not notice there were any differences but it made key’s keycaps get stuck with each other on more curvy surfaces. ↩